Regression testing is an important part of assuring software quality. It helps us to confirm that changes or new features haven’t had a negative impact on the existing software capabilities. Regression tests usually consist of a selected pool of test cases that have been identified as crucial for software to serve its intended purpose.
In terms of QAlity Plus usage, regression is simply just a group of Test Cases which will be performed prior to release. It isn’t different from the regular Test Cycles. Once you are sure of test scripts content, this guide will show you how to navigate QAlity Plus for the regression planning. We can break down this process to the following steps:
Step 1 – Prepare your Test Cases
To systemize and save time, our first step will be to write a Test Case. It’s a scenario which shows step by step what has to be done and checked by the tester.
There are several ways on how you can create a Test Case.
First one, you can create it from scratch using QAlity Plus. Simply open the Jira issue and add a new Test Case. Fill in your Test Step, Test Data, Results and add necessary attachments. If most of your Test Steps are repeatable, you can also choose to clone it and adjust, in order to speed up the process.
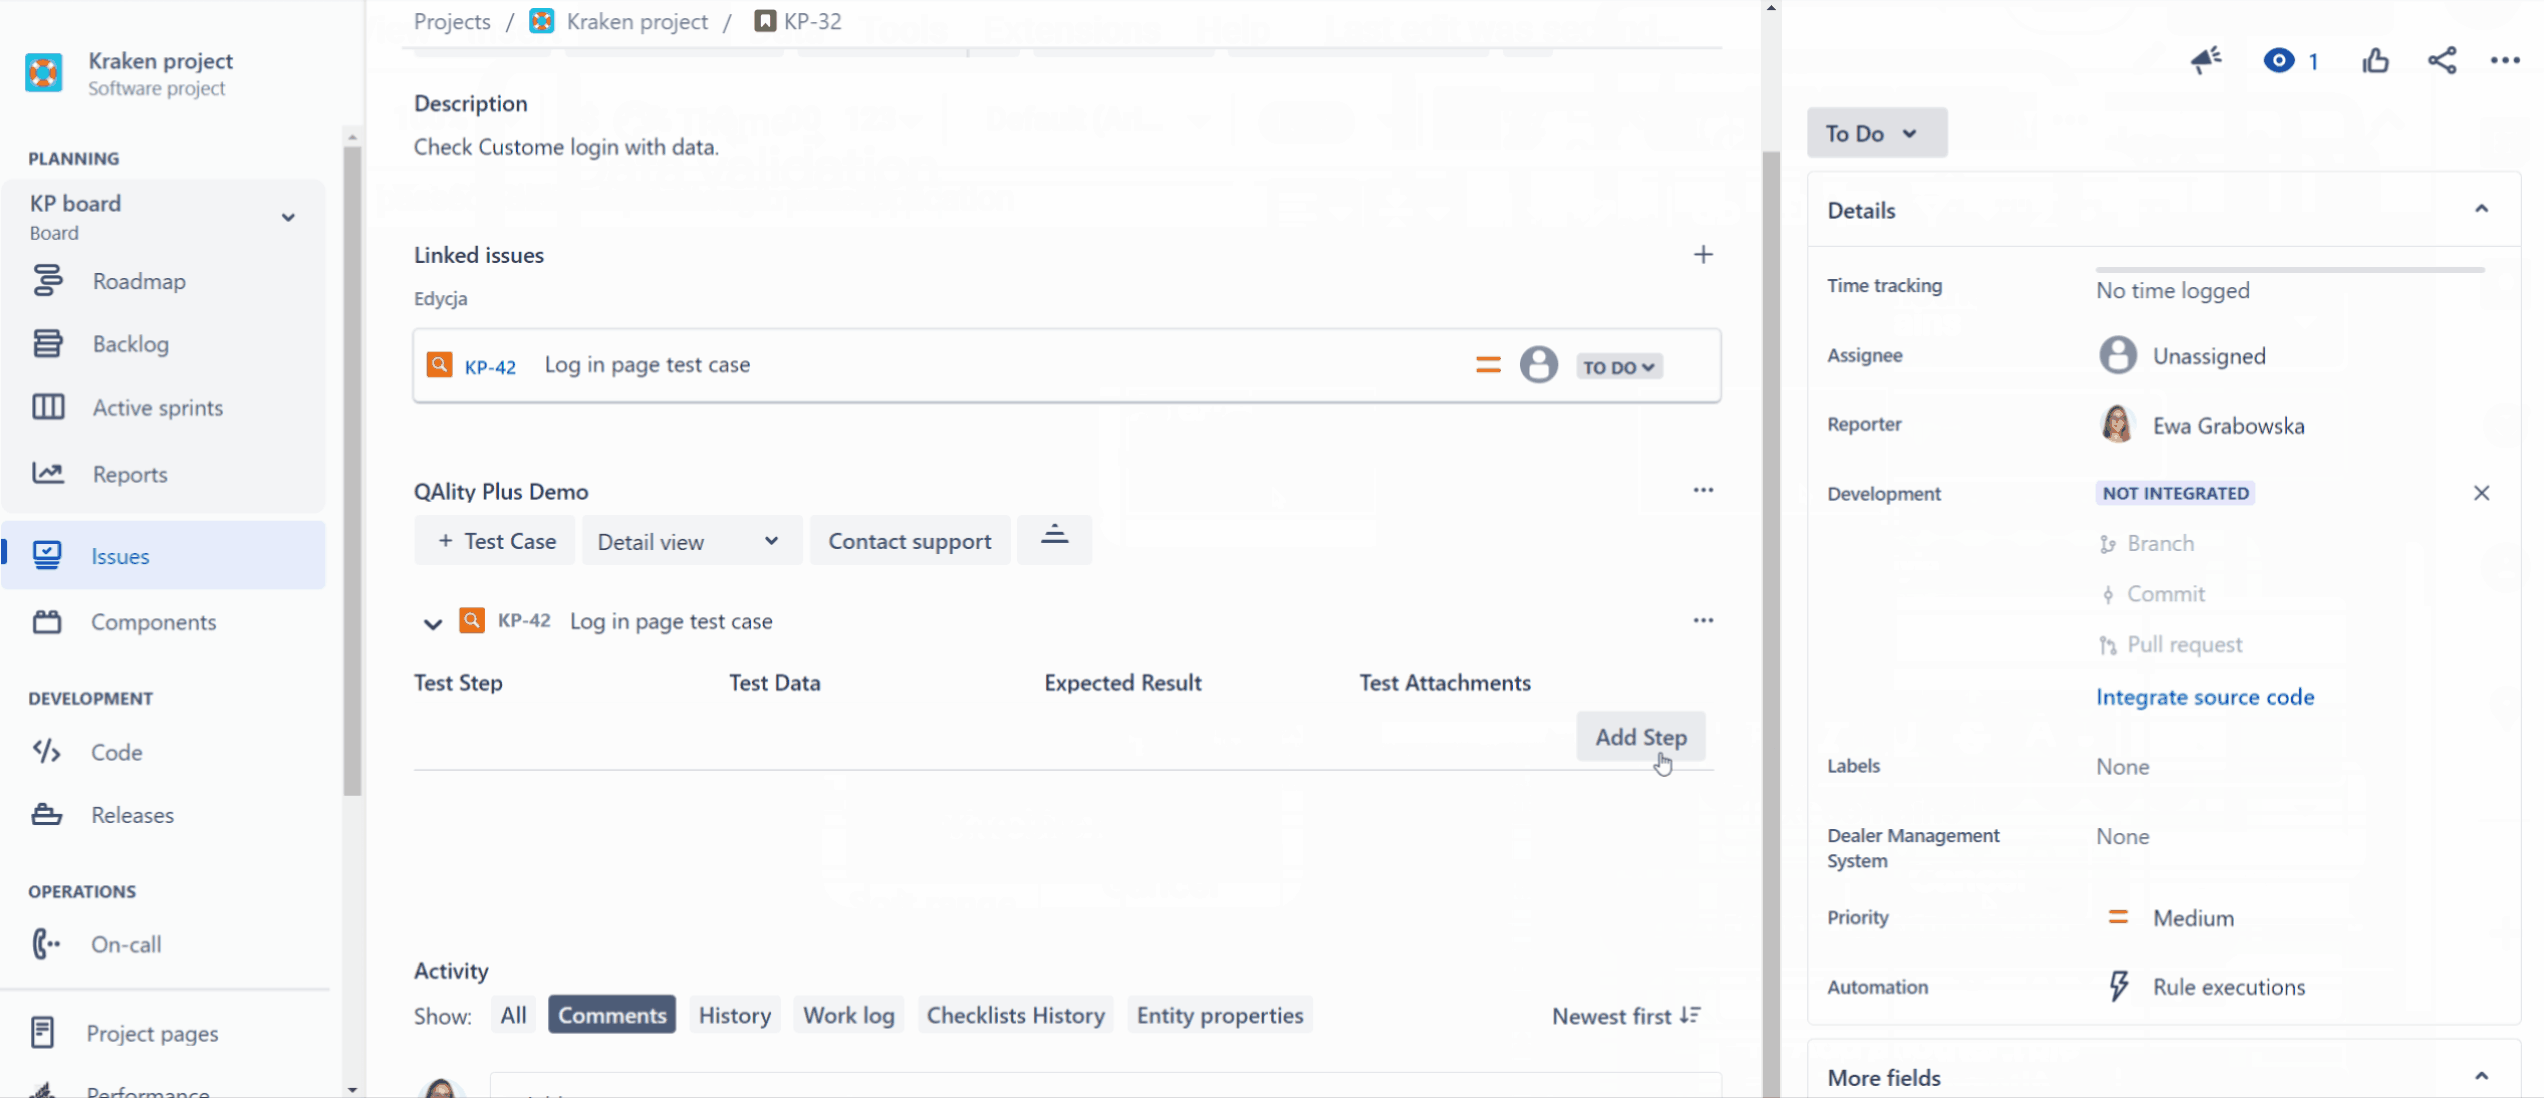
Similarly, you might already have another Test Case which fits your needs almost perfectly, but you don’t want to edit it. In such cases QAlity Plus allows you to clone your entire QAlity Test issue alongside with the content of the Test Steps and Test Data.
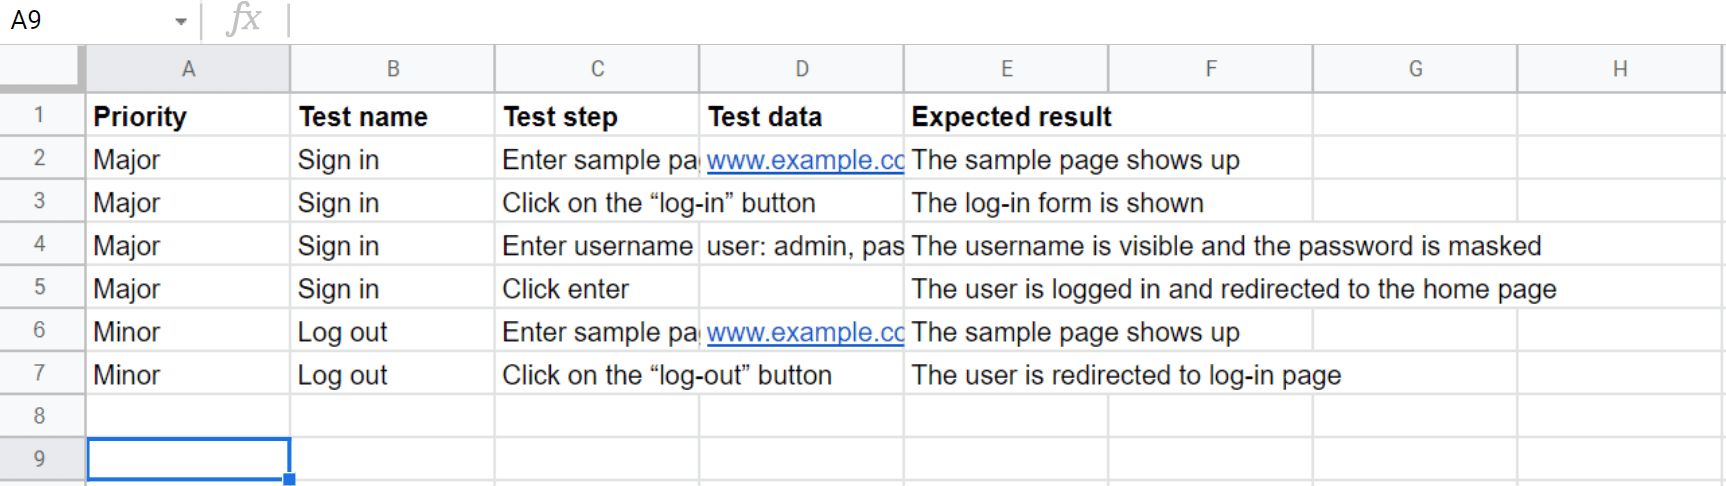
What if you are transitioning from another tool? It’s simple, just export your Test Cases, prepare a CSV file according to our template, and click to import.
See our migration guide in the documentation here.
Step 2 – Group your Tests
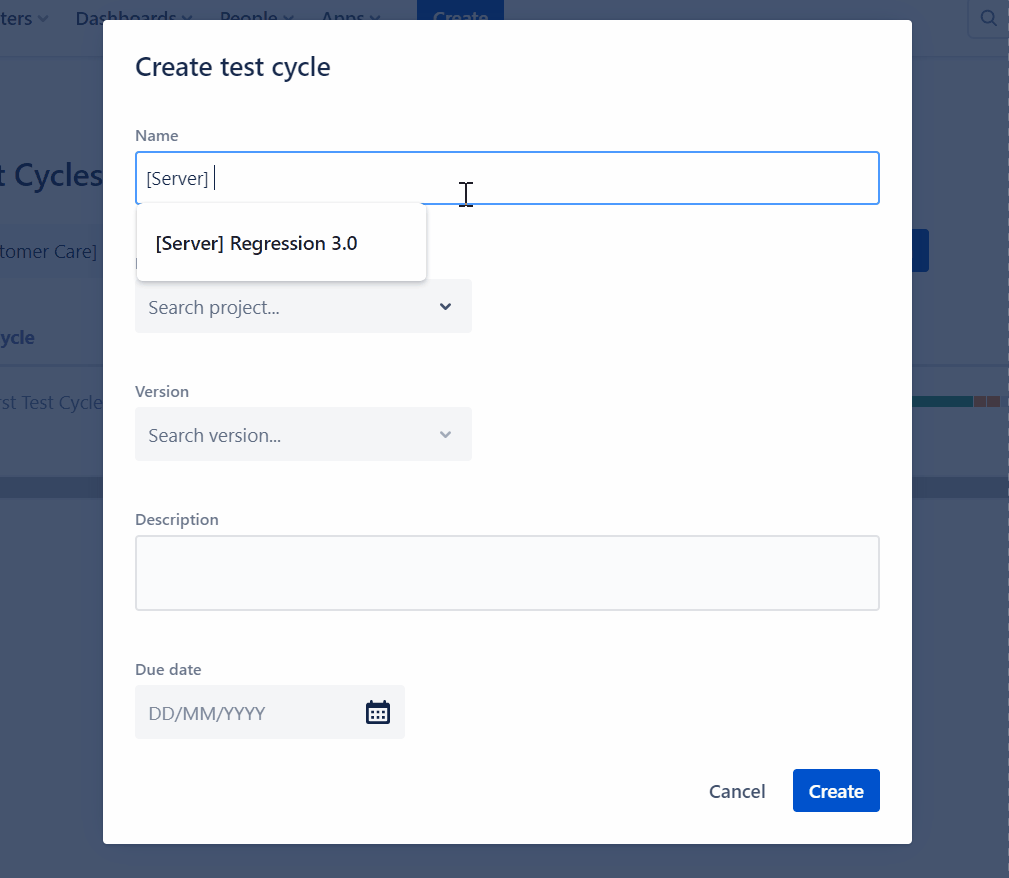
Each Test Case can be added to a Test Cycle, which can be named according to your needs, for example Kraken App, Sign in modal, or [Server] Regression 3.0.
While creating your Test Cycle you can associate it with a specific software version – Jira’s project Release.
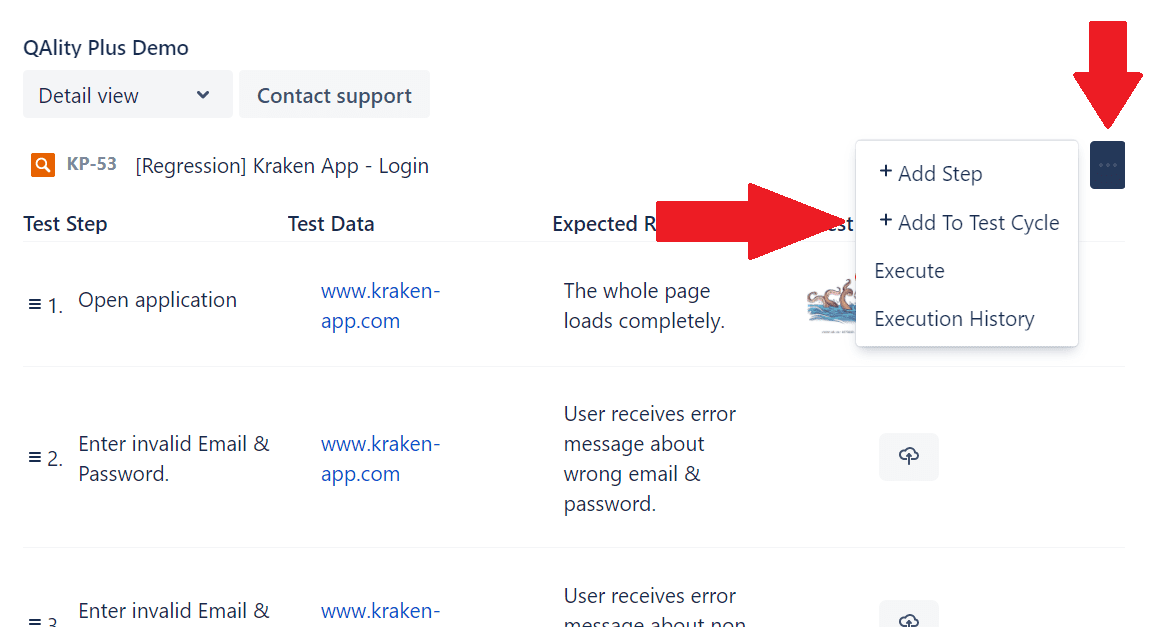
The easiest way to add the Test Cases to the Test Cycle, would be from the three dot menu in the QAlity Plus app issue view.
However, depending on your needs, you might want to add either three or thirty Test Cases to the Test Cycle, and there is a quicker way to do it.
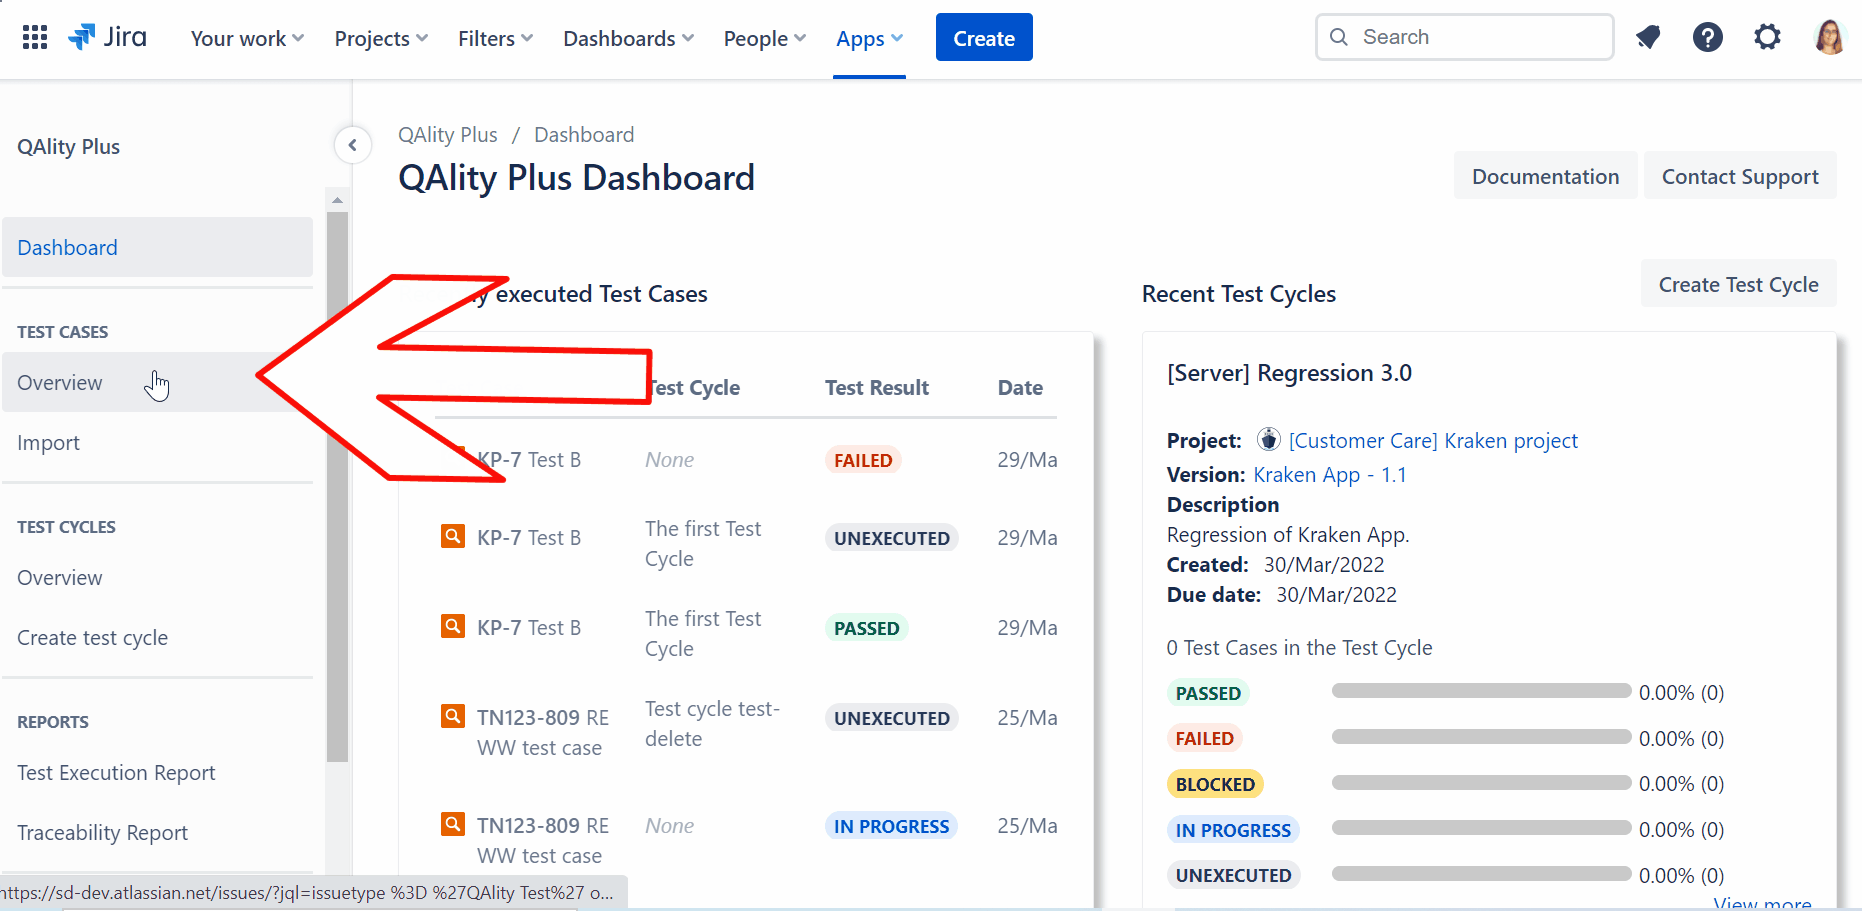
Go to Test Cases Overview. You may notice that QAlity Test issues behave just like regular Jira issues and have their advantages. You can use the JQL filter and click on QAlity logo to bulk add it to the Test Cycle.
Similarly, you can bulk update QAlity Tests to add them to an Epic. You can also add a label, in order to easily distinguish them.
Step 3 – Execute
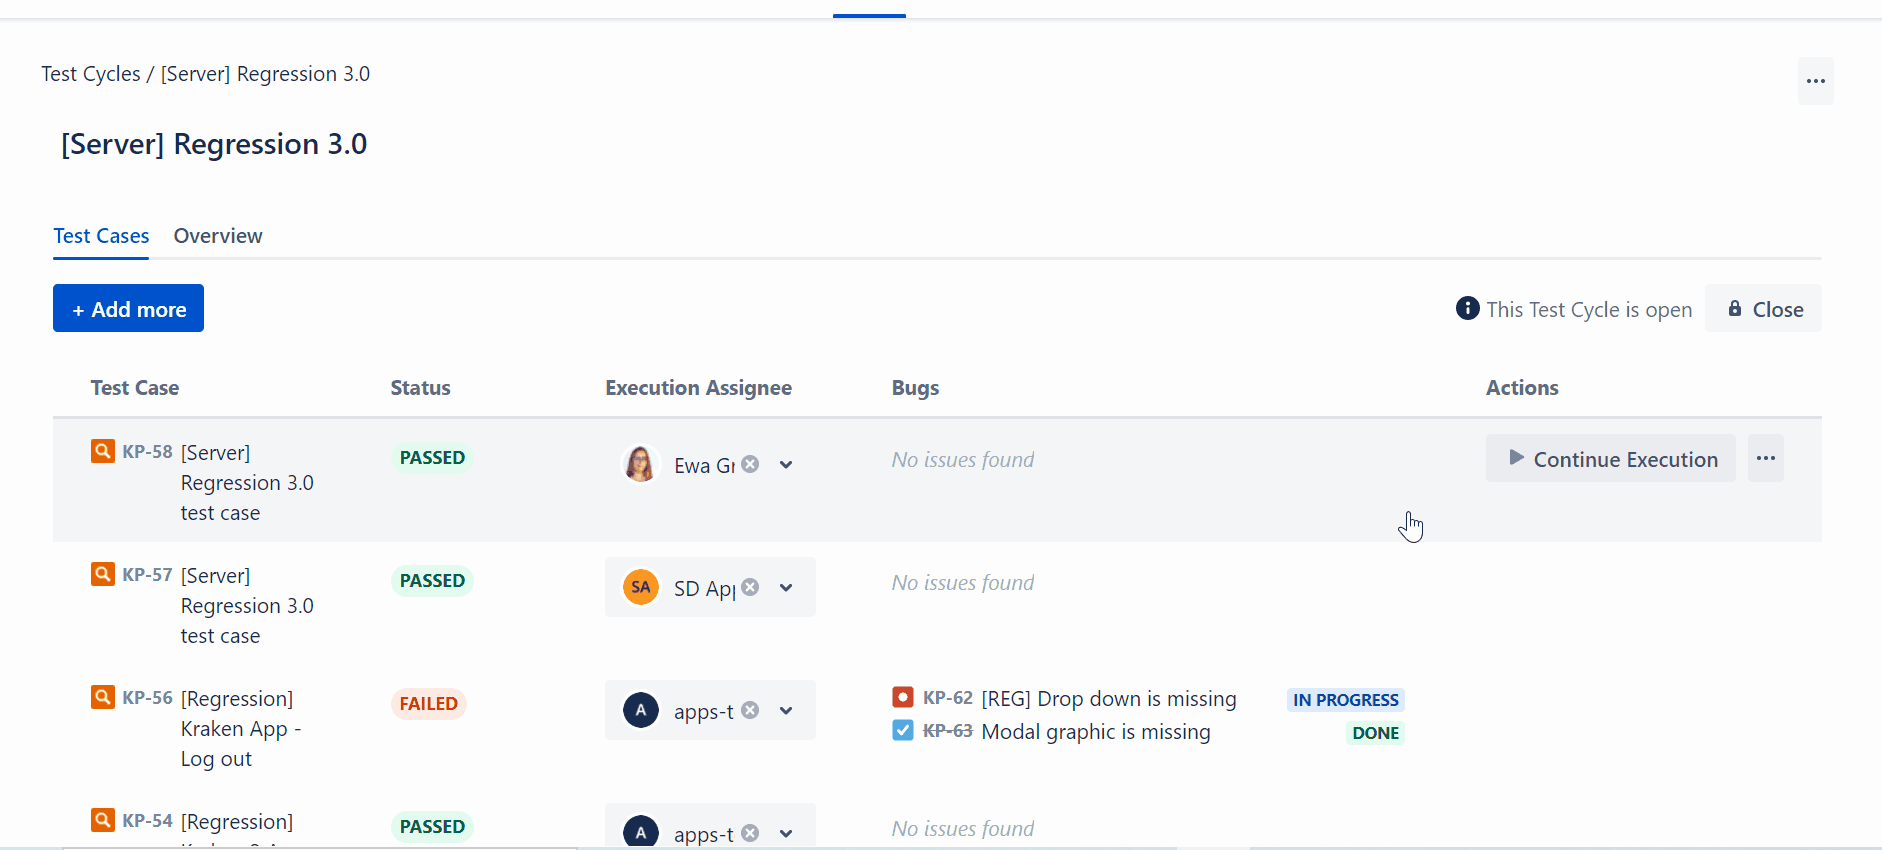
Once you have your Test Cycle ready, it’s time to execute it! Go to your Test Cycle Overview and view all of the Test Cases. Here, you can easily assign who is responsible for which Test Execution, and later on monitor the whole Test Cycle progress, including the statuses of linked bugs.
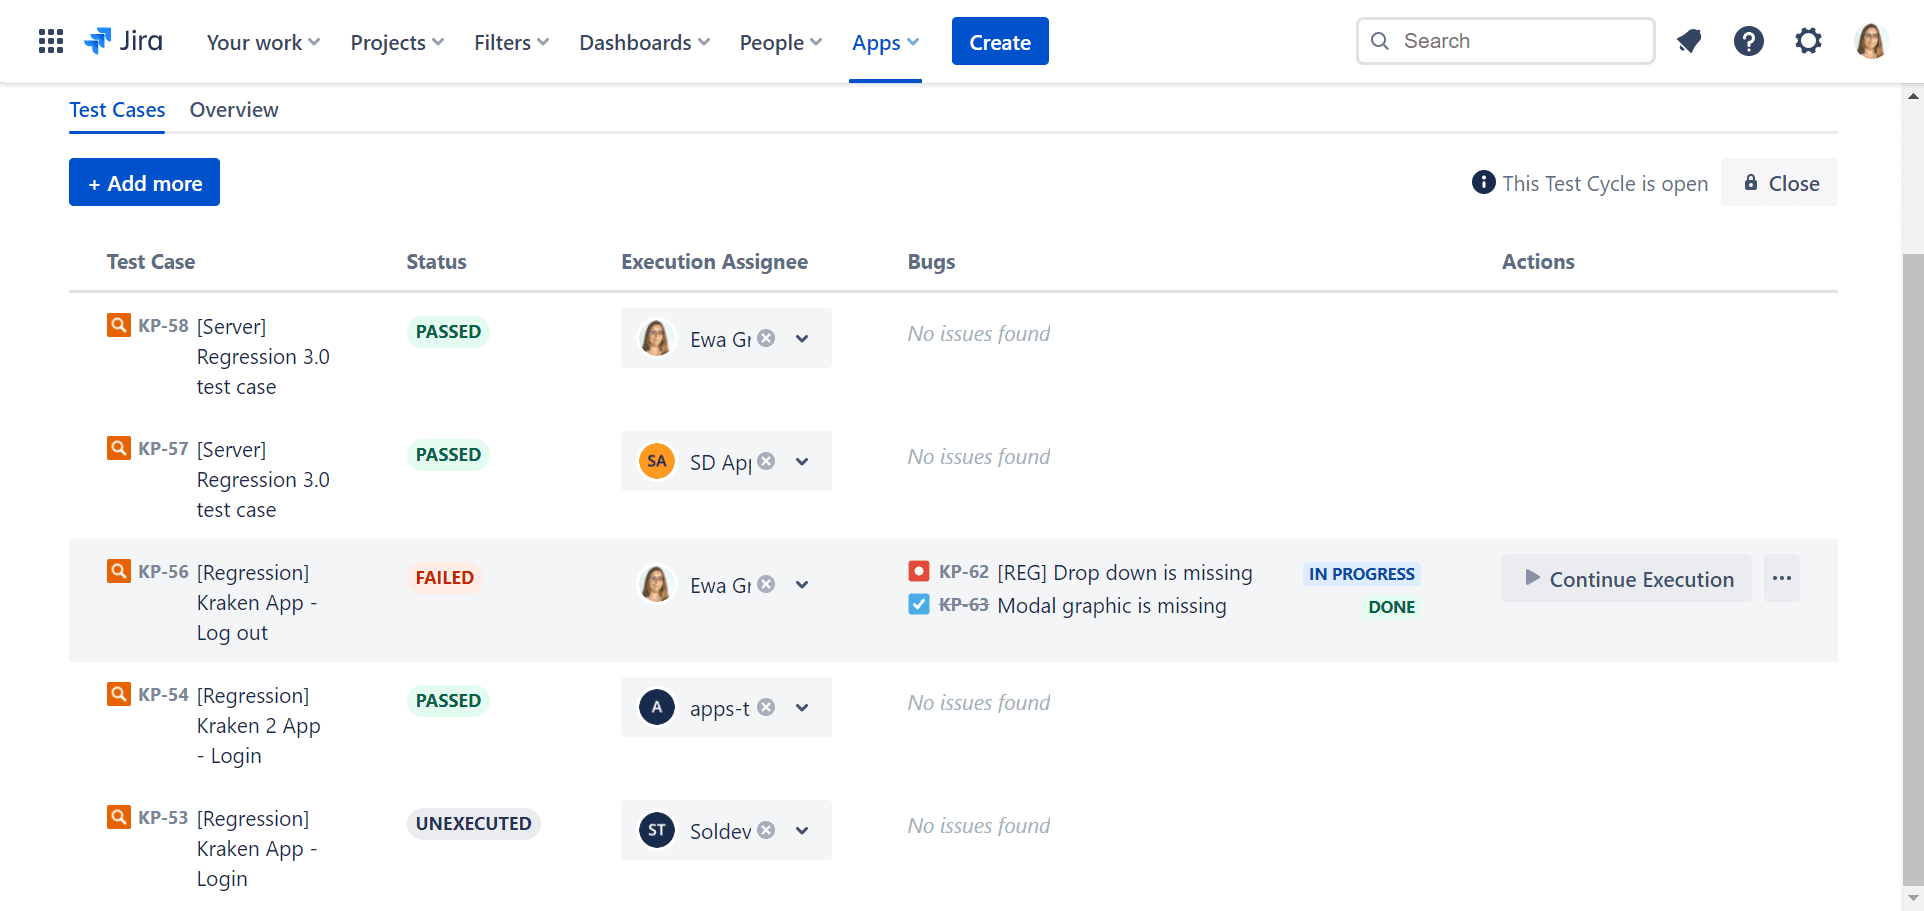
Click to progress to the Test Execution page, where you can comment on the performed Test Steps and report encountered bugs.
To make things go smoother, QAlity Plus displays Past Executions History, which has all of the crucial information about previously failed Test Executions. At a glance the Tester can check the history of failed steps, its comments, and statuses of the bugs associated with the Test Case.

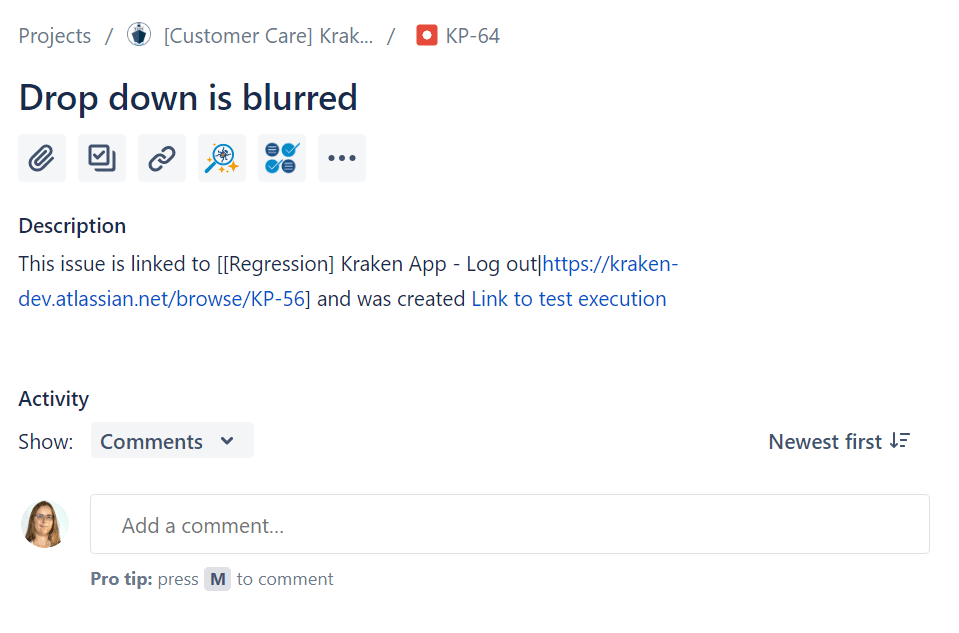
Should any new bugs arise, the Tester can report it right from the same page. The Bug description will be auto-filled with links to the related Test Case and Test Execution, making it easier for the product owner and developers to learn about the circumstances in which the bug occurred.
At this point you might be wondering: What happens when I need to Retest my Test Execution?
Each Test Case added to the Test Cycle represents its Execution. So, go ahead and add the Test Case as many times as you need to re-execute it.
Step 4 – Rearrange for the next release
Of course, regression is a reappearing task, but it doesn’t mean that you will have to repeat the same preparation process over and over again. A few clicks will do!
The whole Test Cycle can be cloned alongside with all of the associated Test Cases. Hover over the Test Cycle details and click to edit it accordingly to your needs. Rename it, change Version and description as needed and you are ready to go!
Lastly, you can choose to select your Test Cycles as open or closed to help you keep track.
That’s all! Now, you can create your own regression using QAlity Plus – Test Management for Jira. Start your free trial of QAlity Plus here or check out the costless version with fewer features here.