


QAlity – Test Management for Jira and QAlity Plus – Test Management for Jira are test management tools available for Jira Cloud and Jira Server. Even though QAlity is capable of configuring most of the required things upon install, there’s just a tiny bit of the configuration required from your side as well. This short guide explains how to get started with the QAlity on your instance.
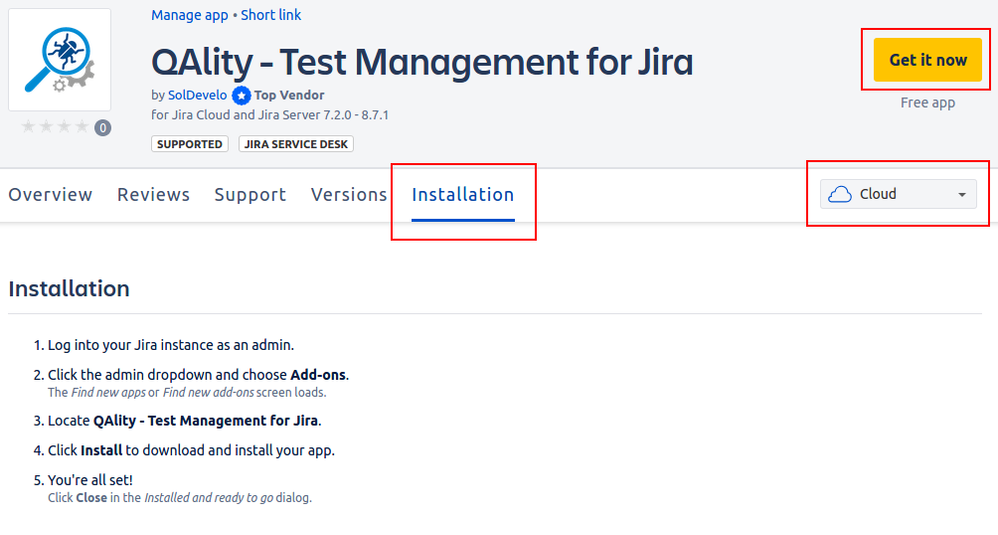
The first step is to install the app in your instance. The steps will differ depending on whether you use Jira Cloud or Jira Server. In either case, the installation steps are listed on the marketplace page for QAlity. You will also be able to install it directly from the marketplace page, by clicking “Get it now”.
Once the app is installed, it will automatically add the “QAlity Test” issue type to your Jira instance. You can recognize it with the following icon.
In order to use this issue type, you will need to enable it for your project though. Setting up the “QAlity Test” issue type is a little different for the Next-Gen projects on Jira Cloud and is explained in detail below.
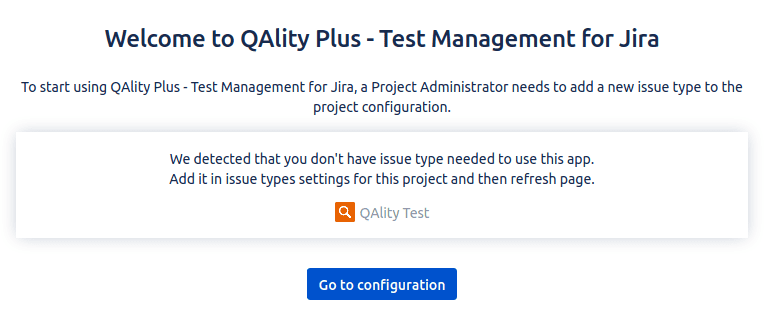
For standard projects on Jira Cloud and on Jira Server, you will be informed about the need to enable the “QAlity Test” issue type when you view any issue in your project. The following information shows up when you did not enable the required issue type yet. Jira administrators can click on the “Go to configuration” to set up the QAlity Test issue type for the project.
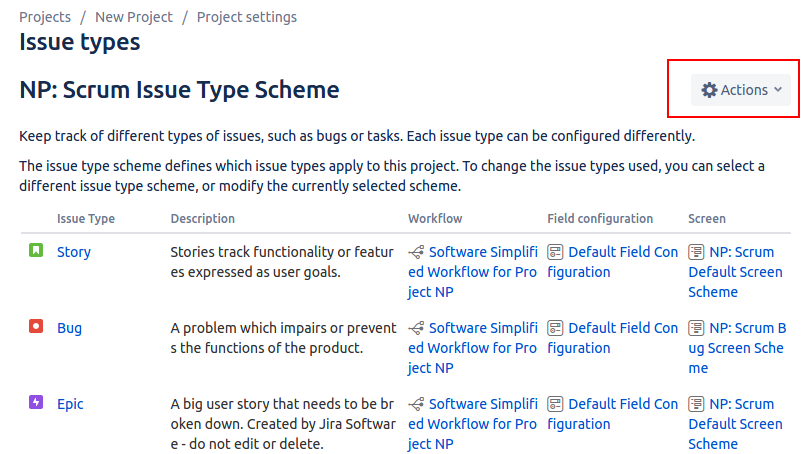
The configuration should display currently enabled issue types as shown below. In order to modify them, click on Actions and Edit issue types.
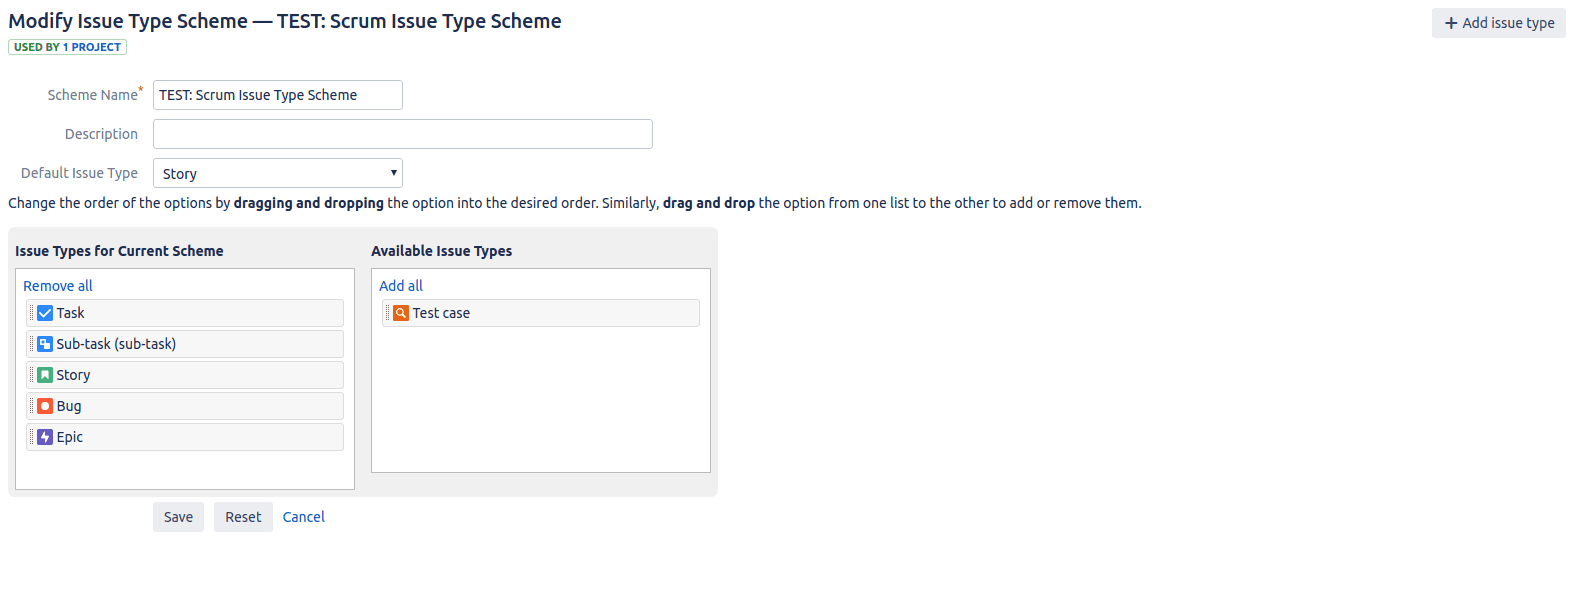
This will bring you to the screen that displays issue types in two columns. One column showing the issue types that are currently enabled. And another column displaying issue types that are available, but not enabled. Move the “QAlity Test” issue type from one column to another, in order to enable it and then confirm it by clicking on Save. That’s it! The QAlity Test issue type is now enabled.
Next-gen projects use simplified configuration and therefore setting up the issue types works in a different way. Similar to classic projects, you will be informed about the need to enable the issue type as soon as you enter any of your Jira issues. A Jira administrator can click on “Go to configuration” to set up issue types.
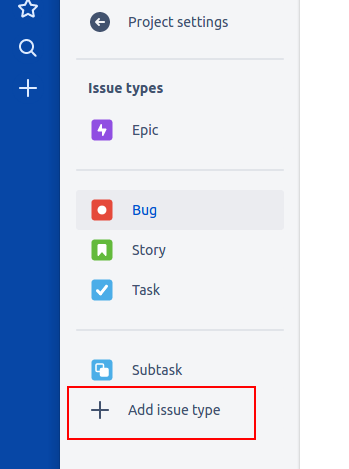
Available issue types will be shown in the menu on the left-hand side. In order to add a new issue type, you need to click on the “Add issue type” button.
This will display a dialog that allows you to provide the details for the new issue type. Please note that the new issue type must be named “QAlity Test”. You can also use the icon that was attached above in order to easily distinguish this issue type from others.
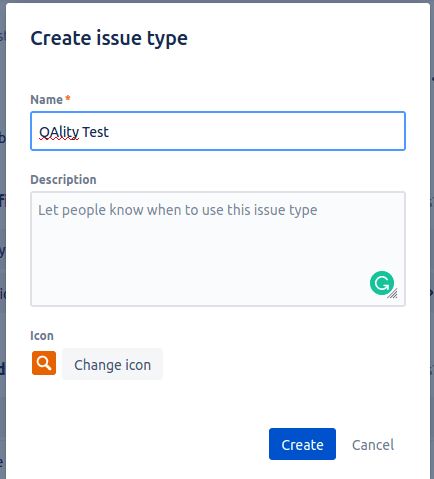
Confirm the addition by clicking “Create” and the configuration is done!
Once you have enabled the issue type, you should be able to create and manage test cases in your project. The issue of view should have the following section.

If you can see it, it means that you are all set to start using the app!
QAlity – Test Management for Jira is available for Jira Cloud and Jira Server on the Atlassian Marketplace free of charge. There’s also a free trial available for QAlity Plus – Test Management for Jira. Have any questions or troubles setting up the app? Check out our documentation or contact our support team.
Don't miss new updates!