
What does it mean that the Product Backlog item, usually represented as an issue in Jira, is “Done”? It can stand for all kinds of different things to the Scrum Team members and stakeholders. Has the change been deployed to the test instance? Has it been tested, and if so, how? Has the documentation been updated yet? All of this needs to be crystal clear to ensure transparency, which is the foundation of Scrum.
The Definition of Done (or DoD for short) can, and usually will, vary between the Scrum teams significantly. It’s also highly encouraged to review and improve the current Definition of “Done” at the Sprint Retrospectives. As the product and the Scrum Team mature, more strict criteria may be required to ensure a high quality of what is delivered.
Given its importance and constant evolution, how can the Scrum Team ease the management of the DoD and make sure that the increments always follow it? One way is to track the Definition of “Done” with Multiple Checklists for Jira – Atlassian Marketplace app available for Jira Cloud and Jira Server! This guide explains how to achieve this in just a few steps.
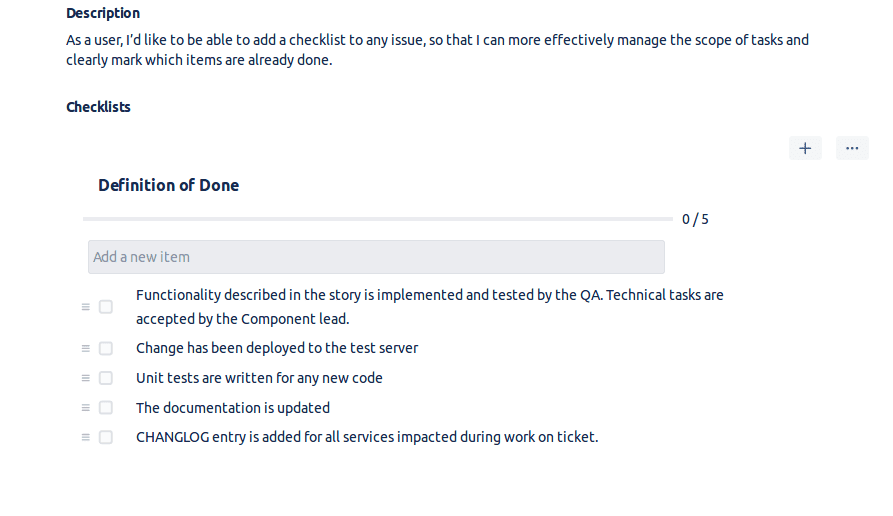
1. Add the DoD as a checklist to any of your issues
With Multiple Checklists for Jira, the checklist user interface is automatically injected to all of your Jira issues. Simply go to any of your issues, and you will notice that the checklist is already there, right below the description. You can rename the default “To Do” to something more descriptive – for example “Definition of Done”. Then add your DoD as actionable checklist items. If your Definition of Done is not in the form of a bullet list, you may want to work on converting it first. Adding checklist items is as simple as writing it down in the “Add a new item” field and accepting it with a button, or hitting enter.
2. Save the checklist with the DoD as a template
Once you are happy with the checklist item, find and click the save icon, next to your checklist, to initiate the template addition process.
Upon hitting the button you will be shown a request to type the name of your template. The name that you enter here will also be used as a default name for each of the checklists that is added from this template. You can name it “Definition of Done”, or be more specific, eg. “Definition of Done for bugs” or “Definition of Done for project xyz”. Don’t worry, after a template is saved, you can still edit it at any point in the Manage templates view.
3. Configure the template to be automatically added as a checklist to new issues (optional)
This step is optional, but it can save you a lot of time. Instead of adding the checklist manually to each of your Jira issues, you can configure it’s automatically added to each new Jira issue. In order to do so, go to Manage Templates and select Assign to projects next to the checklist template that you have saved in the previous step. Please note that you will only be able to access this setting if you are either the project or Jira administrator.
More information: How to automatically add checklists to your Jira issues – step by step guide
In the Automate template view, select the projects and issue types that should have the checklist with the DoD added. As mentioned earlier, different projects may have varying Definitions of Done. Select only the projects this specific DoD is valid for. If you have a more detailed version of it, for example, one that applies only to bugs, you can also select specific issue types that will have the checklist added. That way you can have one version of the Definition of Done added for bugs, and another one added for features, and other types of issues.
4. Verify and repeat for other projects
You should be all set with the Definition of Done tracking now. You can enter any Jira issue and manually add the DoD there. If you have configured it to be added automatically, you can now create a new issue in your project and verify whether the checklist is correctly added. If it’s not, go back to Manage templates and make sure that the correct project and issue types have been selected.
If everything works as expected, you can repeat the same for your other projects or add a different version of your Definition of Done to other issue types.
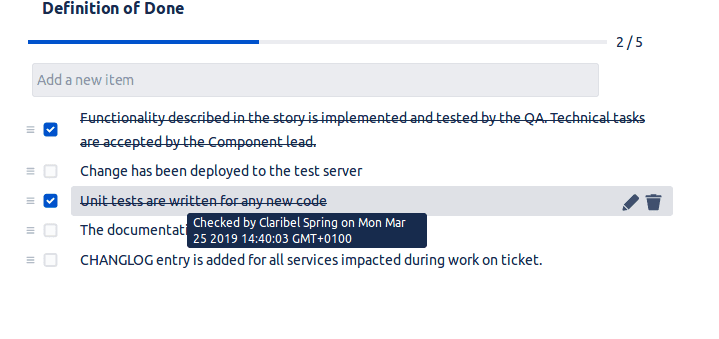
5. Make use of the actionable items
Now that the tracking of the Definition of “Done” is established, you may also want to assign someone to verify it and check off the completed items on the checklist. This can either be a developer who is working on an issue, a tester who is verifying the ticket, a Product Owner who is accepting the increment or anyone else that fits into your workflow. It can also be a combination of all of those people, eg. the developer makes sure the automated tests are there, the QA makes sure the documentation is updated and the Product Owner that the change is deployed on the UAT server. Either way, you will have the visibility into what items are completed and who verified them.
Visit our Multiple Checklists for Jira website.
Multiple Checklists for Jira are available on the Atlassian Marketplace for both Jira Cloud and Jira Server.
You can also always consult our documentation in case of any issues.