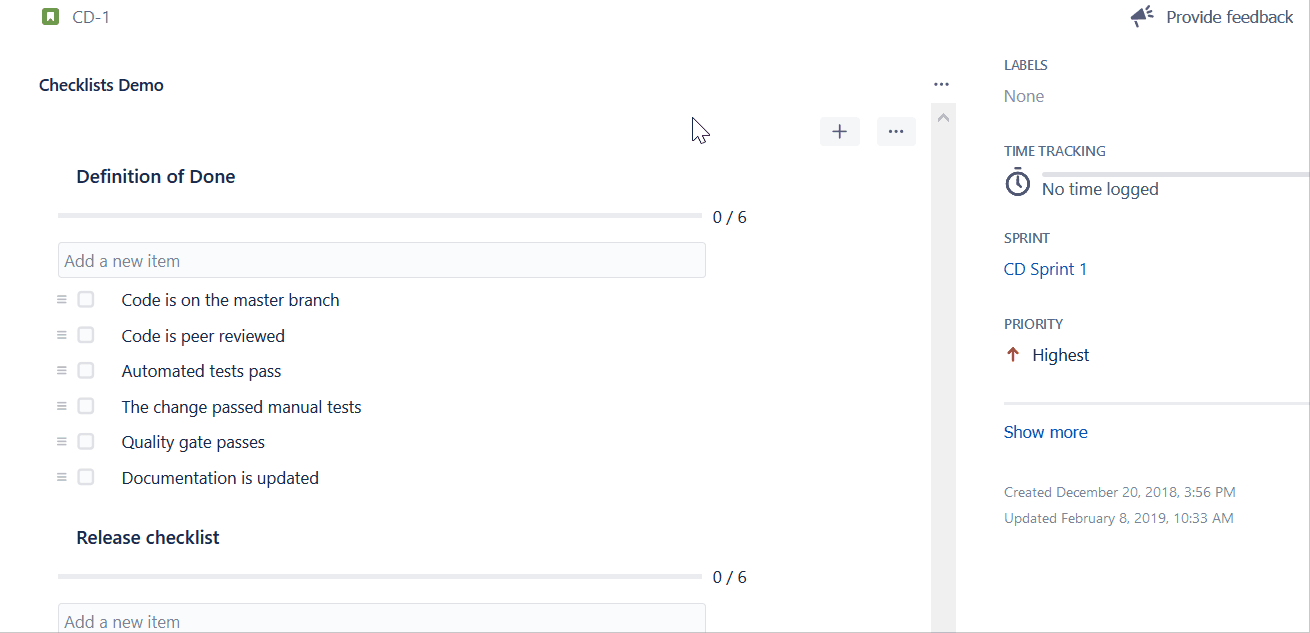
Automatically add checklists to each new Jira issue. This is the desired functionality.
One typical use case is having the “Definition of Done” available by default in each new issue, to make sure that either developers or testers take time to verify if the task is done by the definition the team agreed to follow. Another common case is tracking whether the ticket is ready for development. That may include making sure the bugs have reproduction steps included or that new features have acceptance criteria. The thing about all those mentioned situations is that they all concern universal requirements that apply to the majority of the tasks you and your team face.
You have to stand up to these standards because you want to deliver the highest quality service or product, of course. Still, human memory is faulty which makes it hard to remember every single step on your path to success (or “Done” if you prefer).
Wouldn’t it be great if after entering your Jira issue, you could see right away the complete list of criteria that you have to fulfill?
This guide explains step by step how to achieve this with Multiple Checklists for Jira – an Atlassian Marketplace app available for Jira Cloud and Jira Server.
Get your checklist template ready
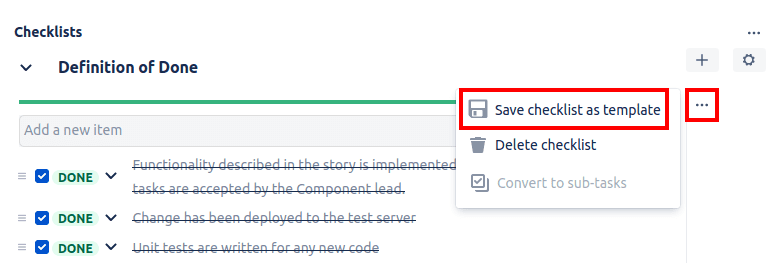
Enter any of your Jira issues and start working on your checklist items. Once you are happy with the results, click the “Save as template” button next to the checklist.
You will be prompted to enter a unique name for the template. Once you have done so, just click “Save” and your template will be saved. Don’t worry, you can always edit the template later on, by adding more items, editing existing ones, reordering them, or deleting.
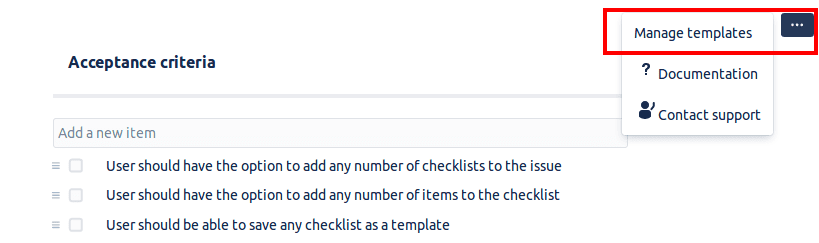
Go to manage templates view
You can access template management either directly from any Jira issue, through Multiple Checklists for Jira options, or via Jira Settings, provided you are the instance administrator.
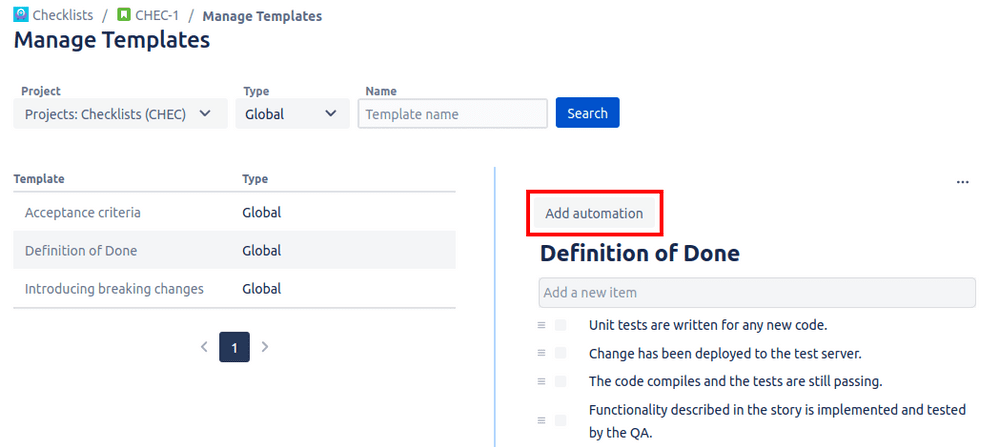
The screen allows you to edit and delete the existing templates, as well as assign them to be automatically added to the newly created issues. The last one is only available if you administer at least one project on the given Jira instance.
Automate template
Provided you are a project admin or Jira instance admin, you can click on “Automate template” after selecting a template name from the list.
You can then select specific issue types for each of those projects, that will have the selected template automatically added as a checklist to each created issue of those types.
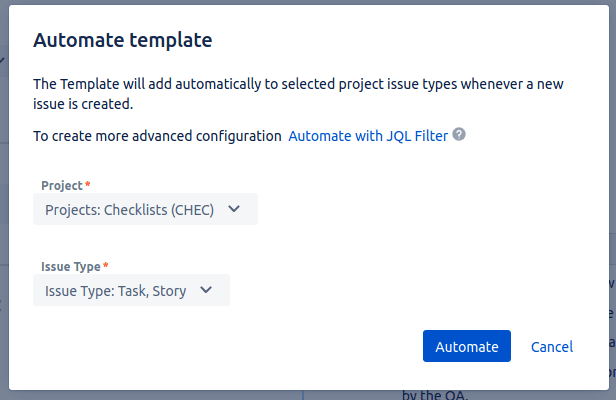
Please note that if you are automating a project template, you will not be able to select any other projects. Project templates can only be added to the project they belong to.
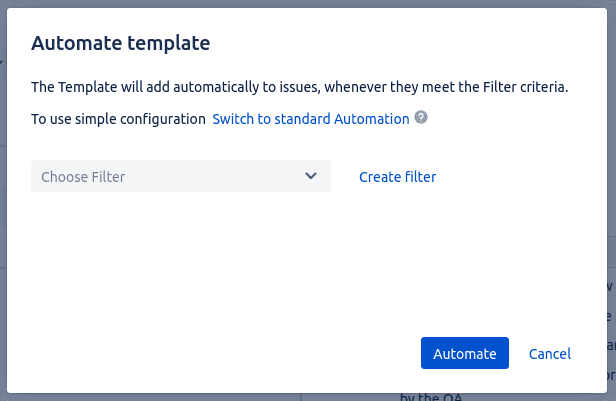
Automate template with JQL filter
If you need more freedom in assigning the checklist automatically, you can choose to automate it with a JQL filter, by clicking on “Automate with JQL Filter”. Project templates can be automated with JQL by project admins, while global templates can only be automated by JQL by global Jira admins.
After clicking the “Automate with JQL filter”, simply select one of the JQL filters you want to use. If the filter doesn’t exist yet, you can create one, by clicking on the “Create filter”. Please note that the filter cannot be set as private in order to be accessible from the automate template screen. Make sure to change the filter access rights if you intend to use it for checklist template automation.
Checklist templates automated with JQL are added as soon as the Jira issue reaches a state described by the JQL query, e.g. JQL: issuetype in (Story, Task) AND status = Testing will add checklist template to stories and task, when their status is changed to “Testing”. The templates are only added once to the Jira issue. If your issue leaves the Testing status and then enters it again, the checklist will not be added again.
Test it out!
That was it! You should be all set.
Now go ahead and create a new issue to see if everything works as expected. If you cannot see any new checklist added, go back to the template management view and make sure that you have selected the correct project and issue types.
Visit our Multiple Checklists for Jira website.
Multiple Checklists for Jira are available on the Atlassian Marketplace for both Jira Cloud and Jira Server.
You can also always consult our documentation in case of any issues.